Learn to program your Raspberry Pi
Get to grips with the two standard languages included in Raspbian

Note: Our learn to program your Raspberry Pi tutorial has been fully updated. This feature was first published in May 2013.
In this tutorial, we're going back to the original idea behind the Raspberry Pi – namely, teaching people about technology. Over the course of this article, you'll get a whistle-stop tour of two programming languages that are included in Raspbian, the recommended distribution for the Pi.
If you don't have a Pi, then you can still follow along if you're running Linux – you'll just need to install the programming languages through your distro's package manager. Don't worry if you haven't programmed anything before. We're going to start, quite literally, from Scratch.
Starting from Scratch
Scratch is a great language for learning the basics of programming without having to worry about getting the text perfect. Since everything's done by dragging and dropping program blocks into your script, you don't need to remember any commands.
We're going to make a simple drawing program that lets you use the arrow keys to trace lines onto the screen. The first thing we need to do is create the code that lets us move the cat sprite around the screen.
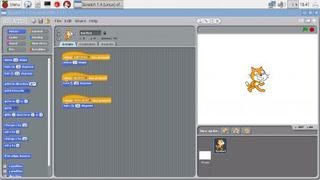
We'll use three separate blocks, each of which is executed when a key is pressed. Click the yellowControl button, then drag and drop When Space Key Pressed into the scripts. This creates a script that runs whenever the user presses the space key. Use the dropdown to change Space to Right Arrow, click the blue Motion button and drag Move 10 steps under it. This will let you move the cat forward by pressing the right arrow.
Next, create similar scripts that turn clockwise when the down key is pressed, and anti-clockwise when up is pressed. Check out figure 1 below to see how it should look.
Get the best Black Friday deals direct to your inbox, plus news, reviews, and more.
Sign up to be the first to know about unmissable Black Friday deals on top tech, plus get all your favorite TechRadar content.
Now we can move around, we need to add a block that lets us draw. We don't want to draw all the time, so we will use Scratch's pen up and pen down actions. When the pen is down, the cat leaves a line behind it when it moves; when it's up, it doesn't.

Using variables
In order to let us toggle between having the pen up and down, we need the code to remember which state it's in. Programs use variables to do this.
A variable is a chunk of memory that you can put data in, and read data from. Before you can use a variable, you have to tell the computer to assign memory to it. We also give it a name that we can use to refer to it in commands.

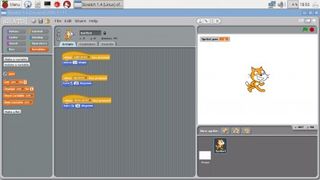
Go to Variables, click on Make a Variable and give it a name. Once this is done, you will see a selection of commands that alter or use the variable. Now we have a way of storing data, we need to tell the computer to vary its behaviour depending on what the variable is.
We do this using an If… Else block. This asks if a statement is true. If it is, it executes the first block of code, otherwise it executes the second.
In our program, we'll take our variable, pen. If it's 0, we'll put the pen down, then set it to be 1, otherwise, we'll lift the pen up and set it to be 0. In this way, we can toggle between the two states using the spacebar. Take a look at figure 3 to see how this should be set up.
Note the use of the operator = in the If statement. This means the first block of code is run only if the variable pen contains (equals) 0 otherwise (else) it runs the second block.

Introducing loops
You can now move the cat around and draw a picture, but wouldn't it be nice if you could insert predefined items, for example circles? We'll add these next. Well, technically we'll add a 24-sided shape that looks pretty close to a circle.
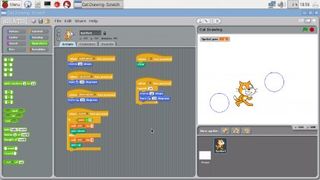
The method to do this is move forward 10, then rotate 15 degrees, then move forward 10, then rotate 15 degrees, and keep doing this until you've completed the circle. You could put in the same two lines 24 times, and it would work, but it wouldn't be very good. It would look ugly, take a while to do, and if you decided you wanted to change the size of the circle, you'd have to do it 24 times.
Instead, we'll use a loop. This is a block that repeats itself. There are different types of loop; some keep going until some statement becomes false (a bit like an If command that gets repeated over and over again), but the one we'll use executes a set number of times.
Inside the loop, we just need the two commands: move forward 10 and rotate 15. Take a look at figure 4 above for details.
Congratulations – you've just completed your first Scratch program! The project file is on the Linux Format DVD, and available from http://www.linuxformat.com/archives.
Programming isn't an end in itself, but a method for getting computers to do your bidding; and now you've got started with Scratch, the only limit is your imagination. You could create the next killer game, a new productivity app or something so futuristic we don't even have a name for it yet.
To get your mind started dreaming up projects, here are a few of our favourites from around the web (if you've got Flash installed, you can run them in your web browser):
- Super Mario Galaxy: Run around the world, picking up stars
- Wipeout: Based on the TV show. The graphics are dubious, but the gameplay is fun
- Space War 4: Old-fashioned vertical scrolling space shooter
- Snake Chamber: Learn about genetics and breed snakes!
- Day Dream: Scratch is also a great tool for creating animations
Most Popular


