How to turn the Raspberry Pi into a wireless printer server
Use CUPS

A printer isn't the most convenient of peripherals. They look out of place on most work desks and create quite a racket when spitting out pages.
You could throw a few hundred quid on a snazzy new network printer that sits in a corner somewhere and can receive print orders from any computer on the local network or you could just hook your regular USB printer to the Raspberry Pi and enjoy the same conveniences offered by top of the line network printers.
If you haven't already used your printer on Linux, before you get started with this project head to the Open Printing website to check whether your printer is compatible with the CUPS printing server software.
If your printer is listed, hook it up to the Raspberry Pi using one of the USB ports. For this project, we're using the Raspbian distro and the Raspberry Pi is connected to the local network via a compatible wireless adaptor.
However, you can also hook the Raspberry Pi up to your network via the wired Ethernet port.
You can follow the instructions in this tutorial by accessing the Raspberry Pi remotely from any other computer on the network. Just make sure that the SSH server inside Raspbian is enabled by using the raspi-config tool. It's also a good idea to assign a fixed IP address to the Raspberry Pi.
You can do this easily from within your router's admin page. For this tutorial we'll assume that the IP address of your Raspberry PI is 192.168.3.111.
Are you a pro? Subscribe to our newsletter
Sign up to the TechRadar Pro newsletter to get all the top news, opinion, features and guidance your business needs to succeed!
You can now access the Pi from within Windows using the PuTTY client or from any Linux distro with the SSH CLI command with:
$ sudo ssh [email protected]
Install CUPS
Once you're inside Raspbian, update the repositories (repos) with $ sudo apt-get update and then install any updates with $ sudo apt-get upgrade . Now pull in the CUPS print server with $ sudo apt-get install cups
When it's installed, add your user to the group created by CUPS called lpadmin that has access to the printer queue.

Unless you have created a custom user, the default user on Raspbian is called pi. Use the following command to allow it to interact with the printer: $ sudo usermod -a -G lpadmin pi
Here we use the usermod tool to add ( -a ) the pi user to the lpadmin group ( -G ). By default, CUPS can only be configured from the local computer that it's installed on.
Because that doesn't work in our case, we need to edit its configuration file to allow us to make changes to the server from a remote computer. First of all, you need to create a backup of the original configuration file with:
$ sudo cp /etc/cups/cupsd.conf /etc/cups/cupsd.conf.orig
Then open the file with the nano text editor: $ sudo nano /etc/cups/cupsd.conf . Inside the file, scroll down to the following section:
# Only listen for connections from the local machine
Listen localhost:631
Comment out that line (by adding the # to the beginning of the line) and add another to ask CUPS to accept connects from any computer on the network. Make sure the section looks like this:
# Only listen for connections from the local machine
# Listen localhost:631
Port 631
Then scroll further down in the configuration file until you reach the sections, and add a new line that reads Allow @local just before the close of the section. The section with the appended line should now read like this:
< Location / >
# Restrict access to the server
Order allow,deny
Allow @local
< /Location >
Now add the Allow @local line to the other two Location sections – and
Save the file and restart the CUPS server with: $ sudo /etc/init.d/cups restart
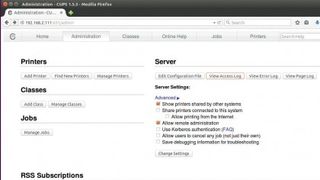
You should now be able to access the CUPS administration panel via any computer on your local network by pointing the web browser to your Pi. Then follow the walkthrough over the page to add your printer to CUPS.
Some Linux distros ship with a restrictive iptables firewall policy that doesn't allow connections via the CUPS ports.
Even if Raspbian doesn't, make sure it doesn't throw up any unexpected errors by punching holes in the firewall with:
$ sudo iptables -A INPUT -i wlan0 -p tcp -m tcp --dport 631 -j
ACCEPT
$ sudo iptables -A INPUT -i wlan0 -p udp -m udp --dport 631
-j ACCEPT
If you connect to the Raspberry Pi via Ethernet instead of a wireless adaptor, modify the command and replace wlan0 with eth0 . When you are through setting up your printer using the CUPS administration panel, it's time to make it accessible to other machines on your network.
While Linux distros will have no trouble detecting your new network printer, making them visible to Windows and Apple devices requires a couple of extra steps.

Network-wide access
For Windows, install the Samba server on the Raspberry Pi with $ sudo apt-get install samba . Then open its configuration file (/etc/samba/smb.conf) in the nano text editor and hunt for the section labelled [printers] and make sure it contains the line:
guest ok = yes
Then scroll down to the [print$] section and change its path to the following:
path = /usr/share/cups/drivers
Then scroll up to the Global Settings section at the top of the configuration file. Modify the workgroup parameter within to point to the name of your workgroup, which by default is named WORKGROUP .
Also enable the wins support by adding the line wins support = yes
Now save the file and restart Samba with $ sudo /etc/init.d/samba restart .
Then head over to the Windows machine and launch the Add New Printer wizard and click on the option to install a network printer. Thanks to the modified Samba configuration, the wizard will detect and list any printers hooked up to the Raspberry Pi.
If you have Apple devices, you can enable support for Apple's AirPrint system, which allows you to print from the iPad and iPhone. For this, just install the Avahi daemon with sudo apt-get install avahi-daemon on the Raspberry Pi, which will then make the connected printer visible to AirPrint-compatible devices.
In addition to the ability to use our network printer from within graphical applications across all platforms, we can also use it to print from the command line interface. Furthermore, we can also interact with the printer using the Python programming language.
With almost two decades of writing and reporting on Linux, Mayank Sharma would like everyone to think he’s TechRadar Pro’s expert on the topic. Of course, he’s just as interested in other computing topics, particularly cybersecurity, cloud, containers, and coding.
Most Popular


