How to use anything as an iPhone live wallpaper
Long live wallpaper
Make your own live wallpaper
The ability to use a Live Photo as the Lock screen wallpaper on an iPhone 6S or iPhone 6S Plus is ripe for fun, yet Apple provides no way to use an existing video in this way. It turns out that it's possible using nothing more than Keynote, Photos and a shared photo album published to iCloud. (If you prefer, you can use another app that can export QuickTime movies in Keynote's place.)
This opens up all sorts of opportunities to turn hand-drawn or computer-generated animations into Lock screen wallpapers, or you may just want to convert an animated GIF of amusing animal antics for when you need a pick-me-up; just press your phone's screen and try not to burst out laughing if you're somewhere that would be inappropriate!
Obstacles to watch out for
Note that the crossfade and enlargement from a Live Photo's still part to its video is baked into iOS and can't be suppressed, but perhaps you've realised this already with Live Photos made using your iPhone's camera.
There are two stumbling blocks to be aware of. First, when taking a Live Photo in step 6, hold your iPhone in landscape orientation, with its Home button on the right. This may seem nonsensical given the portrait Lock screen, but any other way will require you to rotate your still in Preview to ensure it and your video are the same way up on your phone; this saves you some experimentation.
The other hurdle, also in step 6, is locating the parts of that Live Photo after importing it into your Mac's photo library. Finding the still part in the Masters folder is relatively simple because subfolders there organise photos by year, month and date taken. Things are mildly trickier in the modelresources folder, so use View > Arrange By > Date Added in the Finder's menu to bring the most recently added items (the folder containing your newly imported Live Photo's video) to the top of the view.
One more thing: if you've created multiple libraries in Photos, you must switch to the one set as the System Photo Library as only it can use iCloud Photo Sharing, which is the only way to share a Live Photo from Photos for Mac right now. Reports say OS X 10.11.4 will enable the use of iMessage, making the last two steps of our walkthrough simpler through the use of an empty library, rather than your main one, which will be easier to browse in Finder.
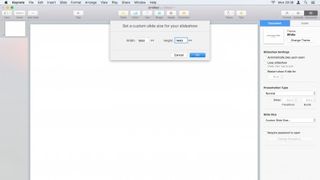
1. Prepare a Keynote project
In Keynote, choose File > New and pick any template, then delete everything from the slide. Choose View > Inspector > Document and set a custom slide size: 790x1054 (width by height) for an iPhone 6S, or 1080x1440 for an iPhone 6S Plus.
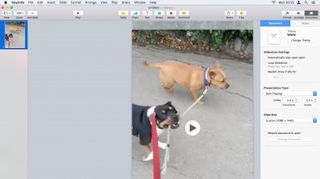
2. Set some timings
Above the slide size, set the presentation to play by itself, then reduce the build time to zero to avoid the video holding on its poster frame. Drag your media from Finder onto the slide and then resize and position it.
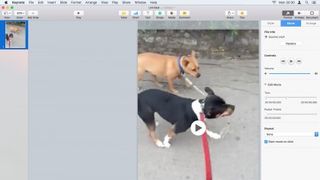
3. Choose what to play
With the media still selected, switch to the Format inspector's Movie pane. Under Edit Movie, drag the in and out points to set which part of the media will play. Actual Live Photos are three seconds long, but ours is a bit longer.
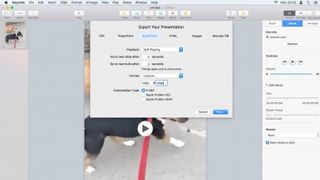
4. Pick out a wallpaper image
Optionally, drag the Poster Frame slider to the frame you want as your Lock screen's static wallpaper. Choose File > Export To > QuickTime. Set Format to Custom, enter the dimensions from step 1, and select H.264.
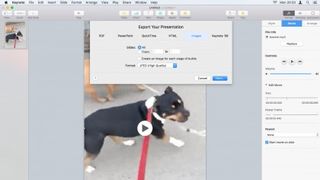
5. Export a photo and a video
Click Next and save the video. When done, choose File > Export To > Images, select JPEG as the format, then click Next. This will create an image of the poster frame. Next, we'll make a Live Photo from these two parts.
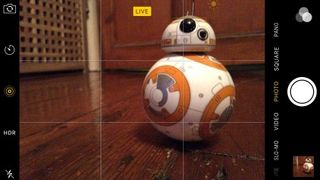
6. Prep a placeholder
Take a new Live Photo using your iPhone, then import it into Photos for Mac. Quit Photos, CTRL-click its library in Finder and choose Show Package Contents. Find the Live Photo's parts in Masters and resources/modelresources.
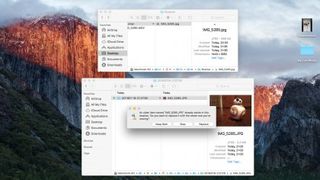
7. Swap in your creations
Rename the files you made using Keynote to match the Live Photo's two parts in Photos' library package, then overwrite the ones in the package with them. You may first need to trash the latter to put your files in their places.
8. Get it onto your iPhone
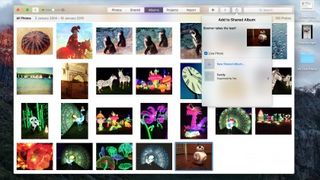
In Photos, open your Live Photo. (Note its thumbnail is unchanged; that doesn't matter.) Pick File > Share > iCloud Photo Library and upload the Live Photo. When it appears on your phone, open it, tap Share, then Set Wallpaper.
- Enjoyed this article? Get more tutorials, guides, and tips on how to get the most from your Apple devices inside MacFormat. Take advantage of an exclusive offer in our sampler today.
Most Popular


